Thursday, April 6, 2023

Schoology Notifications for Families

Parents who use Schoology cannot message directly with students or staff, however; they can change their Schoology settings so that direct notifications come to their email or phone. Schoology notifications can be adjusted by students and staff by following these instructions. 

Navigate to the Settings window by clicking the disclosure triangle next to your name located in the upper-right corner of the page.


Click Settings


Click Notifications.


Click Send Notifications to your phone via text message.  Enter your phone number and select your wireless carrier, click Set Mobile.

Email notifications are enabled by default.


Toggle the notification options on or off based on your personal preference.


The notifications coming via text will appear, based on the phone settings.


Student Data Privacy is Everyone's Responsibility (Part 1)

In today's data-driven world, protecting student data is a foundational requirement of all school districts and the people working in them. Student data privacy obligations and good information security practices are critical to mitigating data breach risks and reaping the benefits of a data-driven instructional program that promotes student success. So what is Student Data and what are the laws that govern and enforce student data policies?  


First, as CoSN (Consortium for School Networking) defines it, student data is:


“any student information that is protected under applicable federal or state privacy 

law, including information that identifies, relates to, describes, could reasonably 

be associated with or could reasonably be linked, directly or indirectly, with an 

individual student. Student Data is also referred to as personally identifiable 

student data or student personal information.” (Siegl & Leichty, 2023)


You may have heard of HIPAA (Health Insurance Portability & Accountability Act, 1996) as it pertains to Health Information protection. HIPPA is a federal law that is enacted and enforced by the Department of Health and Human Services (DHHS). Student Data, on the other hand, is governed by the following Acts and is enforced by the U.S. Department of Education: FERPA (Family Educational Rights and Privacy Act, 1974), COPPA (Children’s Online Privacy Protection Act, 1998), and PPRA (The Protection of Pupil Rights Amendment, 1978). Each of these laws is to be enforced in conjunction with each other’s requirements and state law restrictions. Each of these Student Data information usage rights needs to be considered as a whole and for each use case in order to fully understand their application to a situation.


Each of these student information Acts has considerable verbiage and tenets that make up their implementation and practical enforcement policies. Over the next few months of #bsd220tech Newsletter posts, I will focus on a particular law for that month and highlight some of the main points that I believe teachers should know in order to do their part in protecting student data privacy.


This month’s article focuses on the PPRA (Protection of Pupil Rights Amendment), originally established in 1978. I started with this law because it is less familiar than some of the other laws, it was enacted prior to the Internet's public usage, but it is still enforced and holds true in today's Digital Age. In general, PPRA applies to sensitive information that is collected directly from the student by the school district. PPRA requires school districts to obtain written consent from parents or students over the age of 18 before administering a survey, analysis, or evaluation in which the student is required to disclose any of the following sensitive information (Siegl & Leichty, 2023):  

    • Political affiliations or beliefs of the student or the student’s parent
    • Mental and psychological problems of the student or student’s family
    • Sexual behaviors or attitudes
    • Illegal, anti-social, self-incriminating, or demeaning behavior
    • Critical appraisals of individuals that have a close family relationship with the student
    • Legally privileged or analogous relationships, such as conversations with doctors, lawyers, or clergy
    • Religious practices, affiliations, or beliefs of the student or the student’s parent
    • Income (other than information required by law to determine eligibility for financial aid)

While this information may seem dated, common sense, or obvious, a more modern approach to this law also considers questions that come from social-emotional learning curricula and early intervention programs designed to help identify and support students who may be at risk. These particular programs often touch upon PPRA-sensitive data criteria and should be examined under that lens prior to potentially violating student privacy.


A major requirement of school districts under PPRA is that they must notify parents at least once at the beginning of the school year of the date(s) when the surveys may be conducted; disclose their right to opt their child out of participating; and state their right to request for review any instructional materials used in conjunction with any survey that involves subject matter noted above and those used as part of the educational curriculum. During our Online Registration process for all students, Barrington 220 asks parents/guardians for their permission for these criteria every year.


Also under PPRA guidelines, school districts that participate in any of the following activities must notify parents and students aged 18 and over:


Activity

Minimally Required Notice

Where lawful, with consideration for not just the PPRA but also state laws, the collection of Student Data directly from students to use for marketing or to sell to another party.

Notify parents and students 18 and older
of policies surrounding these activities; be mindful of additional or conflicting state law limitations and community norms with respect to this activity.

Any survey that asks students to provide sensitive information as defined in the PPRA.

Request permission from parents prior to providing such surveys to students.

Any invasive, non-emergency physical examination or screening that is required as a condition of a student’s school attendance, administered by the school and scheduled by the school in advance, not necessary to protect the immediate health and safety of the student or of other students, and not required or permitted by state law.

Notify parents and students 18 and older of times and dates when you plan to perform any of these activities.

(Siegl & Leichty, 2023)


While these guidelines for implementing PPRA were developed prior to public use of the Internet, they still need to be applied to uses relating to electronic information and the “Age of the App.” 


For more information on the PPRA as it applies to online contexts, see What is the Protection of Pupil Rights Amendment? and Protecting Student Privacy While Using Online Educational Services: Requirements and Best Practices. 


Next month’s blog post will tackle FERPA and its many caveats for teachers and school personnel.

Reference:

Siegl, J., & Leichty, R. (2023). Student Data Privacy Toolkit Part 1. CoSN. Retrieved April 5, 2023, from www.cosn.org/tools-and-resources/resource/student-data-privacy-toolkit-1/   

Wednesday, April 5, 2023

Productivity Tip: Text Replacement (Mac and iPad)

When typing on a Mac or iPad (or iPhone), you can save time by reducing your number of keystrokes by setting up Text Replacement. One example that is already built in to your devices is that by typing “omw,” the phrase “On my way!” will appear. You can set up any custom text replacements you wish, from symbols/emoji, to short phrases, or for longer comments.

iPad

Open the Settings app, tap General, tap Keyboard, tap Text Replacement.

Mac

Open System Settings, click Keyboard, click the Text Replacements... button

Setup (iPad and Mac work the same way)

You will notice that one example is provided: if you type “omw” the text will be replaced with “On my way!

By tapping the + you can add your own text replacements. 

Examples:

  • rl I’m running a bit late!
  • np No problem!

Be careful to not choose a typical word as a text replacement! To help solve this issue, you may precede a text replacement with a symbol (such as / or .).

Examples:

  • /title Assistant Superintendent for Technology & Innovation
  • /220 Barrington Community Unit School 220
  • .ti Department of Technology and Innovation
  • .m Empower excellence in every learner.

Bonus!

If you are signed in with the same AppleID on both your iPad and Mac, your Text Replacement settings are automatically shared among all your devices. This “hidden feature” allows you to type characters on the iPad that aren’t available on the iPad keyboard by adding a shortcut on the Mac.

On the Mac, type control+command+space bar to get the Character Viewer; search for a character; double-click the symbol to add it to a document (such as Notes); copy the symbol; and paste it in a new Text Replacement.

Example:

/play  ▶︎


Learn more from Apple


11 Text Input Methods on iPad

One of the many productivity features available on the iPad is its ability to allow users to input text in a variety of ways. This article includes 11 different methods to input text on an iPad Generation 9 (the iPad currently used in Barrington 220).

1. Landscape Onscreen Keyboard (full width)

The full-width Landscape Onscreen Keyboard is likely the keyboard we see and use the most since our iPad case allows us to prop the iPad in landscape orientation (sideways), and this is the default iPad keyboard setting.

Although it has a compact layout, this keyboard’s keys are about the same size as those on a physical keyboard (approximately 11mm wide).

You can hide this onscreen keyboard at any time by tapping the Keyboard button (lower-right corner of the keyboard).


2. Landscape Onscreen Keyboard—Undocked

The iPad allows its onscreen keyboards to “Undock” from the bottom of the screen. This allows the keyboard to be slid up and down the screen so you can type in a custom location and/or allow you to see another part of the screen while the keyboard is showing.

To Undock the keyboard, tap and hold the Keyboard button (lower-right corner of the keyboard) and select Undock from the pop-up menu. To move the keyboard, tap the Keyboard button and slide up or down.

3. Landscape Onscreen Keyboard—Split

The Split Landscape Onscreen Keyboard allows you to hold the iPad in landscape and type comfortably with 2 thumbs.

To Split the keyboard, tap and hold the Keyboard button (lower-right corner of the keyboard) and select Split from the pop-up menu. You can also slide the Split keyboard up or down by tapping the keyboard button and slide up or down.

To “unsplit” (Merge) the keyboard, tap and hold the Keyboard button (lower-right corner of the keyboard) and select Merge (or Dock and Merge) from the pop-up menu. 

4. Landscape Onscreen Keyboard—Floating

The Floating Landscape Onscreen Keyboard allows you to create a “mini-keyboard” (about the size of an iPhone onscreen keyboard) and slide it anywhere on the screen. 

To access the Floating the keyboard, tap and hold the Keyboard button (lower-right corner of the keyboard) and select Floating from the pop-up menu. To move the keyboard, tap the dash at the bottom of the Floating keyboard and drag it anywhere on the screen.

To Dock the Floating keyboard and return it to full size, tap the dash at the bottom of the Floating keyboard and drag it all the way to the bottom of the screen. The keyboard will resize itself and dock to the bottom of the screen. 

5. Portrait Onscreen Keyboard (full width)

The full-width Portrait Onscreen Keyboard is accessible simply by turning the iPad 90º sideways to Portrait mode. Although this keyboard is smaller, one possible advantage to the Portrait full-width keyboard is that it allows more screen to be seen above the keyboard.

You can hide this onscreen keyboard at any time by tapping the Keyboard button (lower-right corner of the keyboard).

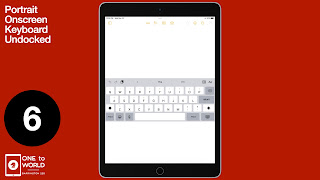
6. Portrait Onscreen Keyboard—Undocked

The Portrait Onscreen Keyboard can also “Undock” from the bottom of the screen. This allows the keyboard to be slid up and down the screen so you can type in a custom location and/or allow you to see another part of the screen while the keyboard is showing.

To Undock the keyboard, tap and hold the Keyboard button (lower-right corner of the keyboard) and select Undock from the pop-up menu. To move the keyboard, tap the keyboard button and slide up or down.


7. Portrait Onscreen Keyboard—Split

The Split Split Onscreen Keyboard allows you to hold the iPad in Portrait position and type comfortably with 2 thumbs.

To Split the keyboard, tap and hold the Keyboard button (lower-right corner of the keyboard) and select Split from the pop-up menu. You can also slide the Split keyboard up or down by tapping the keyboard button and slide up or down.

To “unsplit” (Merge) the keyboard, tap and hold the Keyboard button (lower-right corner of the keyboard) and select Merge (or Dock and Merge) from the pop-up menu. 

8. Portrait Onscreen Keyboard—Floating

The Floating keyboard is also accessible in Portrait orientation. The Floating option provides a “mini-keyboard” (about the size of an iPhone onscreen keyboard) that can be moved anywhere on the screen. 

To access the Floating the keyboard, tap and hold the Keyboard button (lower-right corner of the keyboard) and select Floating from the pop-up menu. To move the keyboard, tap the dash at the bottom of the Floating keyboard and drag it anywhere on the screen.

To Dock the Floating keyboard and return it to full size, tap the dash at the bottom of the Floating keyboard and drag it all the way to the bottom of the screen. The keyboard will resize itself and dock to the bottom of the screen. 

9. External Physical Keyboards

The iPad also has the ability to use an external physical keyboard using any of its three possible connectivity methods: Lightning Port (wired), Smart Connector (physical connection on the side of the iPad), or Bluetooth (wireless). Many, many external keyboard options are available for the iPad at many different prices.

In Barrington 220, visit any Library to borrow one or more wired physical keyboards. (We use the Logitech Wired Keyboard for iPad Lightning Connector that works with the iPad Generation 9).

10. Siri Dictation

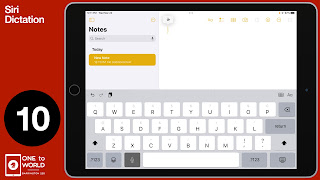
Siri Dictation is also available as a text input method on the iPad. After an initial setup, Siri Dictation is available by tapping the microphone key on the iPad onscreen keyboard to toggle it on and off.

Recent enhancements in Siri Dictation in iPadOS 16 allow you to use Siri Dictation and any iPad keyboard at the same time without turning Siri Dictation off and on.

Of course, Siri Dictation works best in quiet environments.

11. Scribble (handwriting to text)

Using the Logitech Crayon (or an Apple Pencil), you can write on the screen and the iPad will convert printed and/or cursive handwriting to typed text. 

To use Scribble, tap the screen with the Logitech Crayon to access the drawing tools, and select the Scribble pen tool (a pen with the letter “A” on it). Write on the screen and typed text should appear where the cursor is on the screen.


A Note About iPad Onscreen Keyboard Predictive Spelling

In April 2019 Barrington 220 was honored to host author Ken Kocienda, the former Apple employee who invented the iPhone onscreen keyboard and predictive spelling system. In his book, Creative Selection, and in his presentation at Barrington High School, Kocienda explained that the iPhone and iPad keyboard use multiple methods of predicting the words you are typing: 

  • Tap patterns—The iPad makes predictions not just based upon the spelling of the words you are typing, but also the tap pattern on the screen. If you intended to type “bat” and instead typed “bst”—missing the “a” by a few millimeters, the predictive text will correct to “bat”—and likely not “bet,” “bit,” “bot,” or “but.”
  • Common words—The iPad also makes predictions based upon which words are more common in the English language.
  • Dictionaries—Finally, the iPad uses a typical dictionary to predict spelling, as well as a “dynamic dictionary” that is specific to your typing and autocorrect history.

While a physical keyboard can use many of these text prediction tactics, the tap pattern method is unique to an onscreen keyboard, resulting in typing that may be more accurate than a physical keyboard.


Digital Subscription Updates

One of the most important responsibilities of the Department of Technology and Innovation is to ensure that our students, teachers, and staff have access to the best digital resources and tools available. With an ever-growing array of educational technology options, this task can be both exciting and challenging. Every year, we conduct a thorough review of our digital subscriptions, with the primary goal of optimizing their usage and cost-effectiveness. This post is to communicate some of the changes that are coming next year. 

Educational technology constantly evolves, offering innovative ways to engage students, enhance learning experiences, and streamline classroom management. It is essential for our district to regularly evaluate our digital subscription investments. Our annual review process helps us identify underused resources, discover new tools that better align with our district's strategic plan, and ensure that our budget is used effectively.

At the core of this process lies a delicate balance between usage and cost. We aim to provide our district users with the highest-quality digital resources, while also being mindful of the financial implications of our subscriptions. Our review process involves assessing each subscription's usage data, considering the impact on learning, and determining overall value of each resources for the district.

Ultimately, this annual review ensures that our digital resources are aligned with our district's educational objectives and that our investment in technology has a meaningful impact on our students' learning experiences. Your building Library Technology Associates and Instructional Coaches have been made aware of these changes and are ready to assist you in any transitions these updates might create.

Additions for the 2023–24 School Year

Amira (Pilot)—Amira is an elementary reading supplement that provides 1:1 reading instruction and feedback for students learning to read. Powered by artificial intelligence (AI), Amira listens to readers, gives feedback, and suggests corrections. Amira is a supplement to the new reading curriculum being adopted for K–5. This program will be piloted in a limited capacity next year to evaluate possible future expanded implementation.

Writable (Pilot)—Writable will also be piloted next year in a limited capacity. Like Amira, Writable is a supplement to the newly adopted K–5 literacy curriculum. Writable offers individualized writing assessments, feedback, and practice.

Chinese Level Learning—Level Learning is an all-in-one learning platform that offers readings, writing prompts, assessments, and feedback for language learners. (This platform will replace eChinese which will not be renewed.)

Non-renewals for 2023–24

myON—This is one of several e-reading platforms we have available to K–5 students that offers digital books in a variety of subjects. The use of myON has steadily decreased while its price has increased significantly. We currently have several myON resources in our elementary social studies curriculum. The Social Studies steering team, Teacher Librarians, coaches, and LTAs will support identifying new materials within the many e-reading platforms we are keeping.

Explain Everything—With advancements in interactive digital whiteboards such as Jamboard (Google) and Freeform (Apple), Explain Everything has become an expensive redundancy. Explain Everything was available for Grades 4–12 and has minimal usage. Many teachers have moved to Jamboard, Padlet, or Freeform for inline, interactive whiteboard activities. 

eChinese—As mentioned above, eChinese will not be renewed for next year. We halted access to this platform in the Fall after some security issues arose. Level Learning will replace eChinese as our primary Chinese learning resource.

Google Photo—At the end of this school year, we will remove student access to the Google Photo storage option for Grades PK–8. Students in Grades PK–8 can still store photos in their Google Drive or on their iPad devices. 


If you have any questions regarding changes to the digital subscription offerings for next year, please reach out to me, tgorman@barrington220.org, or your building LTA.


Door and Copier Access with New Staff IDs

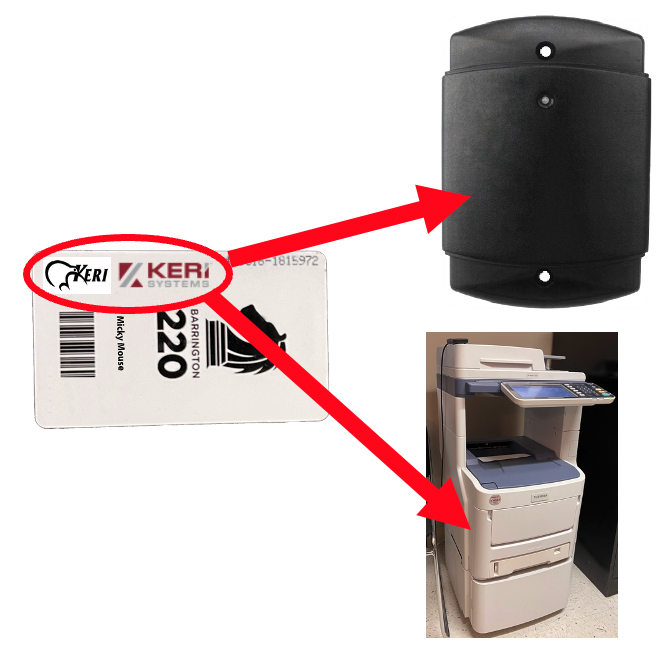
As we transition from our old door security system to a new one, many of you have received new ID cards. These new cards are marked with the logo HID iCLASS DP on the back, and they work with our printer/copier system.

If you're carrying both cards and you scan your cards at a printer to print, you may get a message telling you to associate your new card. Enter your Infinite Campus username and password, and the new card will be associated with your account. The printer/copier system, Papercut, has the ability to associate two cards with an account—so if you associate the new card, the old one will continue to work.

If you are at one of the schools that moved to the new door security system and you don't spend time at any other school, you can use the new card for accessing the building and printing. If you're someone who moves among several schools and the Admin Center, you'll need to continue to use both cards for building entry, but we do strongly encourage you to associate your new card with our printing/copying system.

Old Card
New Card


Popular Recent Posts